
Want a fun treat that’s easy to make? These Easy Peanut Butter Spider Cookies are perfect for any occasion! With just a few simple ingredients, you can whip up tasty cookies that look like cute little spiders. I’ll guide you through the step-by-step process, from mixing the dough to decorating with chocolate legs. Get ready to impress your friends and family with this delightful recipe! Let’s dive in!
Ingredients
List of Ingredients Needed
– 1 cup creamy peanut butter
– 1 cup packed brown sugar
– 1 large egg
– 1 teaspoon baking soda
– 1/2 teaspoon vanilla extract
– 1 cup semi-sweet chocolate chips
– 1 cup pretzel sticks (for spider legs)
– 1 tube of black frosting (for decorating)
Ingredient Substitutions
You can swap brown sugar with maple syrup or honey if you want. This will change the taste a bit but still keep it sweet. For a gluten-free option, look for gluten-free pretzel sticks. These are easy to find at many stores. This way, everyone can enjoy the fun of making these cookies!
Feel free to explore other options and don’t hesitate to get creative. You can even use different nut butters like almond or cashew butter. Just remember, each change will give a new twist to the flavor!
Step-by-Step Instructions
Prepping the Oven and Baking Sheet
To start, preheat your oven to 350°F (175°C). This step is key. A hot oven ensures your cookies bake evenly. While the oven heats, prepare your baking sheet. Line it with parchment paper. This prevents the cookies from sticking. It also makes cleanup easier.
Mixing the Dough
In a medium bowl, add 1 cup of creamy peanut butter, 1 cup of packed brown sugar, and 1 large egg. Stir these together until smooth. You want to mix well so every bite is tasty. Then, fold in 1 teaspoon of baking soda and 1/2 teaspoon of vanilla extract. Mix again until fully blended. Next, carefully add 1 cup of semi-sweet chocolate chips. Make sure they spread throughout the dough. This adds sweet bursts in each cookie.
Baking Technique
For baking, use the drop cookie method. Take a tablespoon of dough and drop it onto the baking sheet. Space each scoop about 2 inches apart. This space lets the cookies spread while baking. Bake them for 10-12 minutes. Look for the edges to set while the centers stay soft. They will firm as they cool. Once done, pull them from the oven. Let them cool on the baking sheet for about 5 minutes before moving to a wire rack. This helps them keep their shape.
Tips & Tricks
Perfecting the Spider Shape
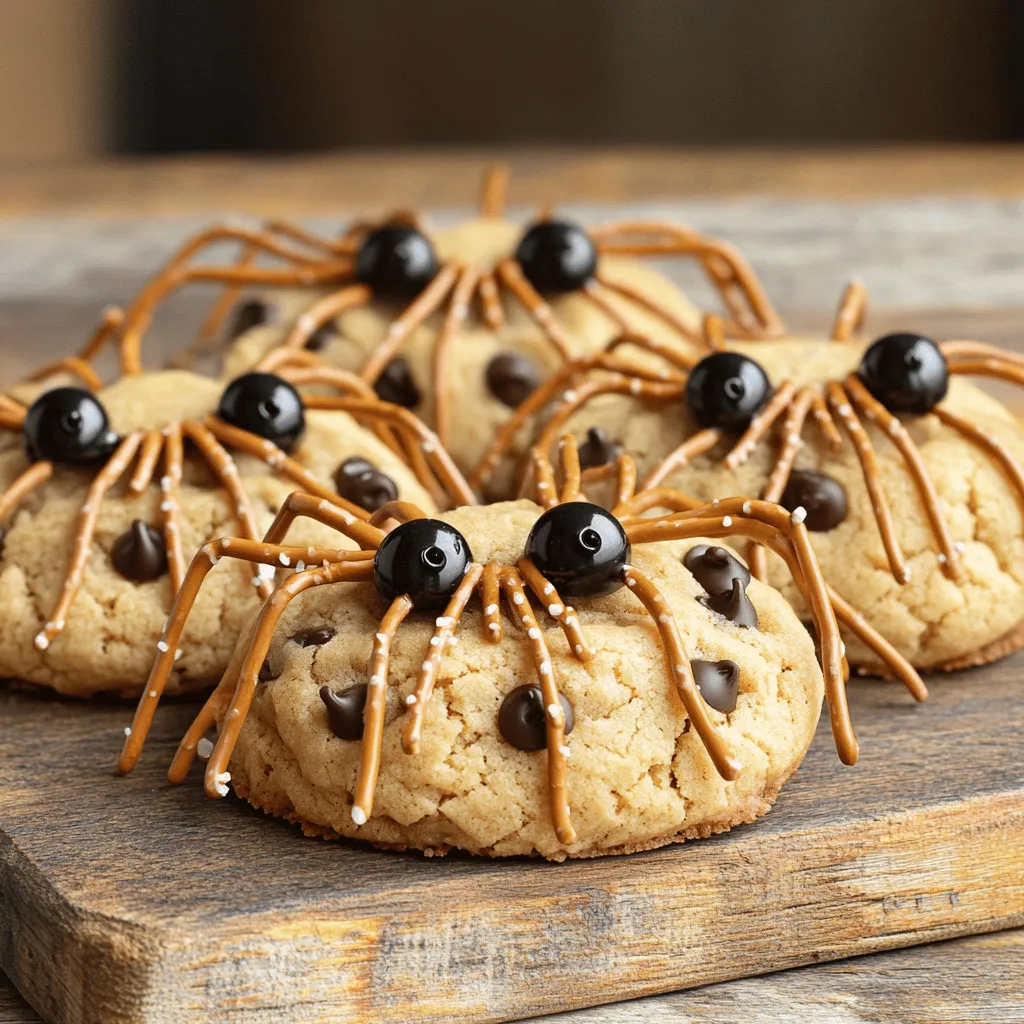
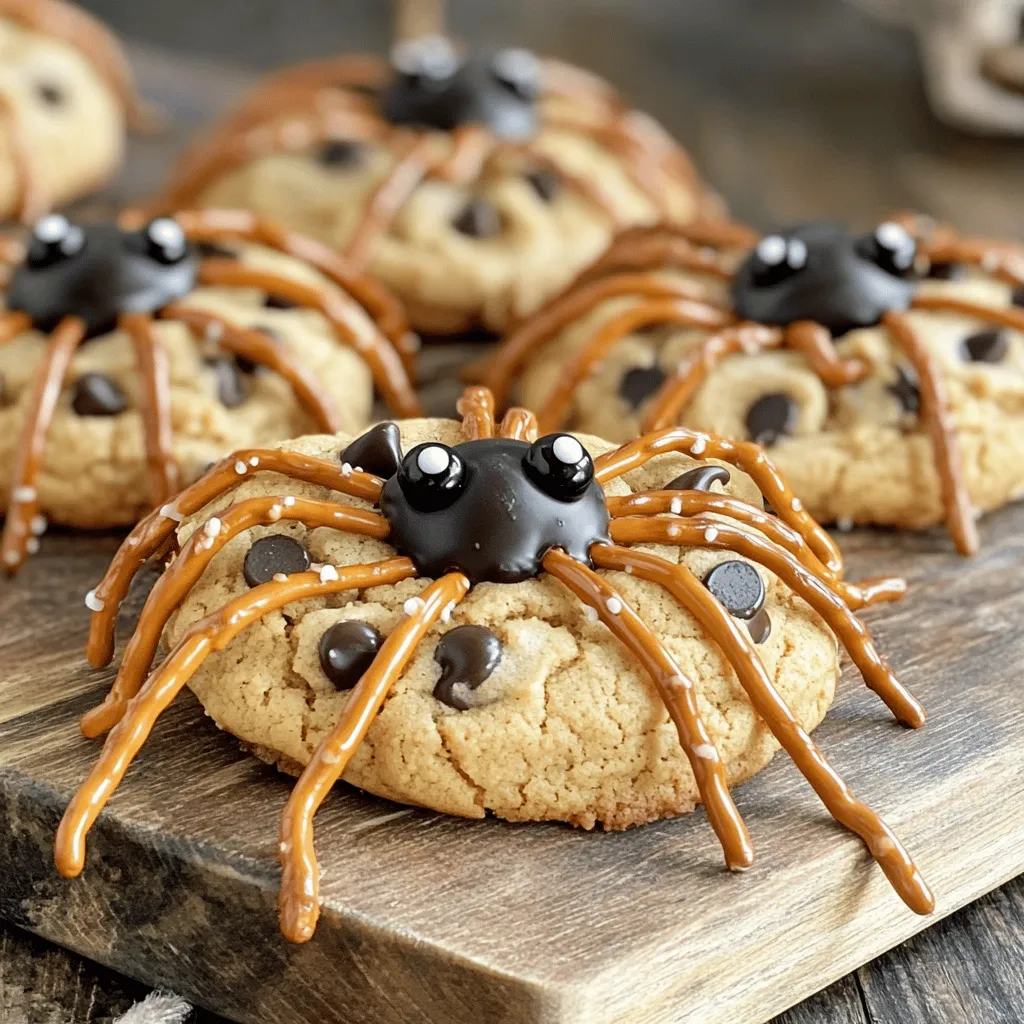
To make the best spider cookies, focus on their shape. First, roll the cookie dough into balls. Keep them about the size of a golf ball. This size helps them hold their shape while baking. When you place the dough on the baking sheet, press them gently to flatten slightly. This step makes it easier to decorate later.
For the spider legs, use pretzel sticks. After baking and cooling the cookies, take two pretzel sticks for each cookie. Press them into the sides of the cookie at an angle. This gives the spider its creepy look. Make sure to press them in evenly so they look great.
Decoration Ideas
Now comes the fun part—decorating your spiders! Use black frosting for the eyes and details. You can make big, round eyes or tiny dots. It’s fun to let kids help with this part. They might have creative ideas!
If you want to get even spookier, try adding candy eyes or using chocolate chips for the eyes. You can also sprinkle edible glitter on top. This makes your spider cookies shine and look more magical. For a Halloween twist, add some gummy worms or candy corn around them.
These decoration tips will surely make your peanut butter spider cookies a hit! For the complete recipe, check the [Full Recipe].
Variations
Flavor Enhancements
You can make your spider cookies even more exciting! Adding peanut butter chips or butterscotch chips gives a new taste. The sweet, creamy flavors mix well with peanut butter. You can also use other nut butters. Almond butter or cashew butter works great. They both have unique flavors that change the cookie’s taste.
Themed Decorations
Make your cookies fit any theme! For Halloween, use orange and black sprinkles. You can also shape them into pumpkins or ghosts. For other holidays, adapt your designs. Try snowflakes for winter or flowers for spring. Use your creativity to make your cookies fun and festive! The possibilities are endless.
Storage Info
Storing Baked Cookies
To keep your peanut butter spider cookies fresh, choose an airtight container. A glass jar or a plastic container works well. These containers keep moisture out and help the cookies stay soft. Store the cookies at room temperature. They last for about 5 days.
Freezing Instructions
You can freeze the unbaked dough for future fun! First, scoop the dough into balls on a baking sheet. Place the sheet in the freezer for about an hour. Once firm, transfer the dough balls to a freezer bag. Be sure to remove as much air as possible. They can stay frozen for up to 3 months.
To bake frozen cookies, take them out and let them thaw on the counter for 15 minutes. Then, bake them as you normally would. This way, you get fresh cookies anytime!
FAQs
Can I make these cookies without eggs?
Yes, you can make spider cookies without eggs! To replace one egg, you can use:
– 1/4 cup unsweetened applesauce
– 1/4 cup mashed banana
– 1 tablespoon ground flaxseed mixed with 2.5 tablespoons water
These options keep your cookies moist and tasty. Applesauce adds sweetness while banana brings a nice flavor. Flaxseed is a great choice for extra nutrition.
How can I make the cookies softer?
To achieve softer cookies, follow these tips:
– Use room temperature ingredients.
– Do not bake them too long. Bake until the edges are set.
– Let them cool on the baking sheet for a few minutes before moving them. This helps keep them soft and chewy.
Are there gluten-free versions of spider cookies?
Yes, you can make gluten-free spider cookies! Use gluten-free flour blends. You can also try:
– Almond flour
– Oat flour
– Coconut flour
Make sure that your pretzel sticks are gluten-free, too. This way, everyone can enjoy these fun treats!
What to do if my dough is too sticky?
If your cookie dough is too sticky, you can:
– Chill the dough in the fridge for 30 minutes. This makes it easier to handle.
– Add a little more flour, one tablespoon at a time, until it feels right.
– Use wet hands when shaping the dough. This helps the dough not stick to your hands.
Remember, it’s all about having fun and creating tasty treats! For the full recipe, check out the [Full Recipe].
In this article, we’ve explored how to make fun and spooky spider cookies. You learned about the key ingredients and possible substitutes. I shared clear steps for mixing and baking the dough, along with tips for shaping and decorating. Remember, you can customize flavors and themes for any time of year. Proper storage will keep these treats fresh for longer. Enjoy making these cookies! They are a delightful way to bring fun into your kitchen. Happy baking!


