
Ready to dive into a sweet treat with no flour? These Flourless Peanut Butter Chocolate Chip Bars are easy to make and oh so delicious! Perfect for a quick dessert or a snack, they’ll satisfy your cravings without the guilt. In this post, I’ll take you through each step, share tips for the best texture, and explore tasty variations. Let’s get baking for a delightful treat everyone will love!
Ingredients
Key Ingredients for Flourless Peanut Butter Chocolate Chip Bars
To make these bars, you need some simple but tasty ingredients:
– 1 cup natural creamy peanut butter
– 2/3 cup packed brown sugar
– 2 large eggs
– 1 teaspoon pure vanilla extract
– 1/2 teaspoon baking soda
– 1/4 teaspoon sea salt
– 1/2 cup dark chocolate chips
Each ingredient plays an important role. The peanut butter gives a rich and creamy base. Brown sugar adds sweetness and moisture. Eggs help bind everything together. Vanilla extract brings warmth and flavor. Baking soda helps the bars rise, giving them a nice texture. Sea salt balances out the sweetness. Dark chocolate chips are the final touch, adding bursts of chocolatey goodness.
Optional Add-ins for Extra Flavor
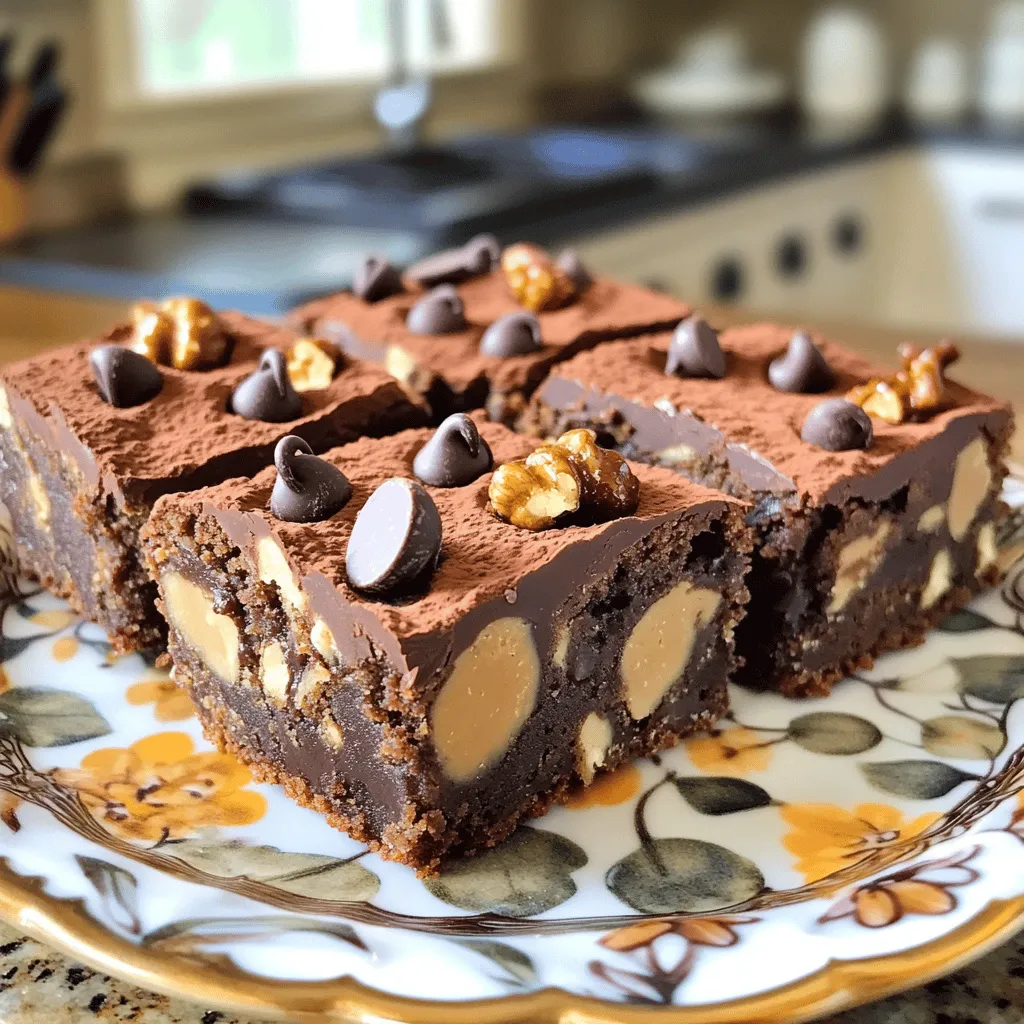
For more flavor, you can add chopped walnuts. These nuts give a nice crunch. They also make the bars more filling. You can use about 1/4 cup of walnuts. If you want a different twist, consider adding coconut flakes or even dried fruit. These add-ins can make your bars unique and fun.
Substitutions for Common Ingredients
If you don’t have a key ingredient, don’t worry. You can easily swap some items. Use almond butter or cashew butter instead of peanut butter. This will change the flavor but still taste great. You can also use white sugar if you don’t have brown sugar. Just remember, it may change the texture a bit. If you need a dairy-free option, check for dairy-free chocolate chips. These swaps keep your bars delicious and suitable for everyone!
Step-by-Step Instructions
Preparation of Baking Pan
First, set your oven to 350°F (175°C). Grab an 8×8-inch baking pan. Line it with parchment paper. Leave some paper hanging over two sides. This makes it easy to lift the bars out later.
Mixing the Batter
In a medium bowl, add 1 cup of creamy peanut butter and 2/3 cup of packed brown sugar. Mix them well until smooth. This creates a rich base. Next, add 2 large eggs, one at a time. Mix well after each egg. Now, pour in 1 teaspoon of pure vanilla extract, 1/2 teaspoon of baking soda, and 1/4 teaspoon of sea salt. Stir until the batter is smooth. Finally, fold in 1/2 cup of dark chocolate chips and 1/4 cup of optional chopped walnuts for extra crunch.
Baking and Cooling Process
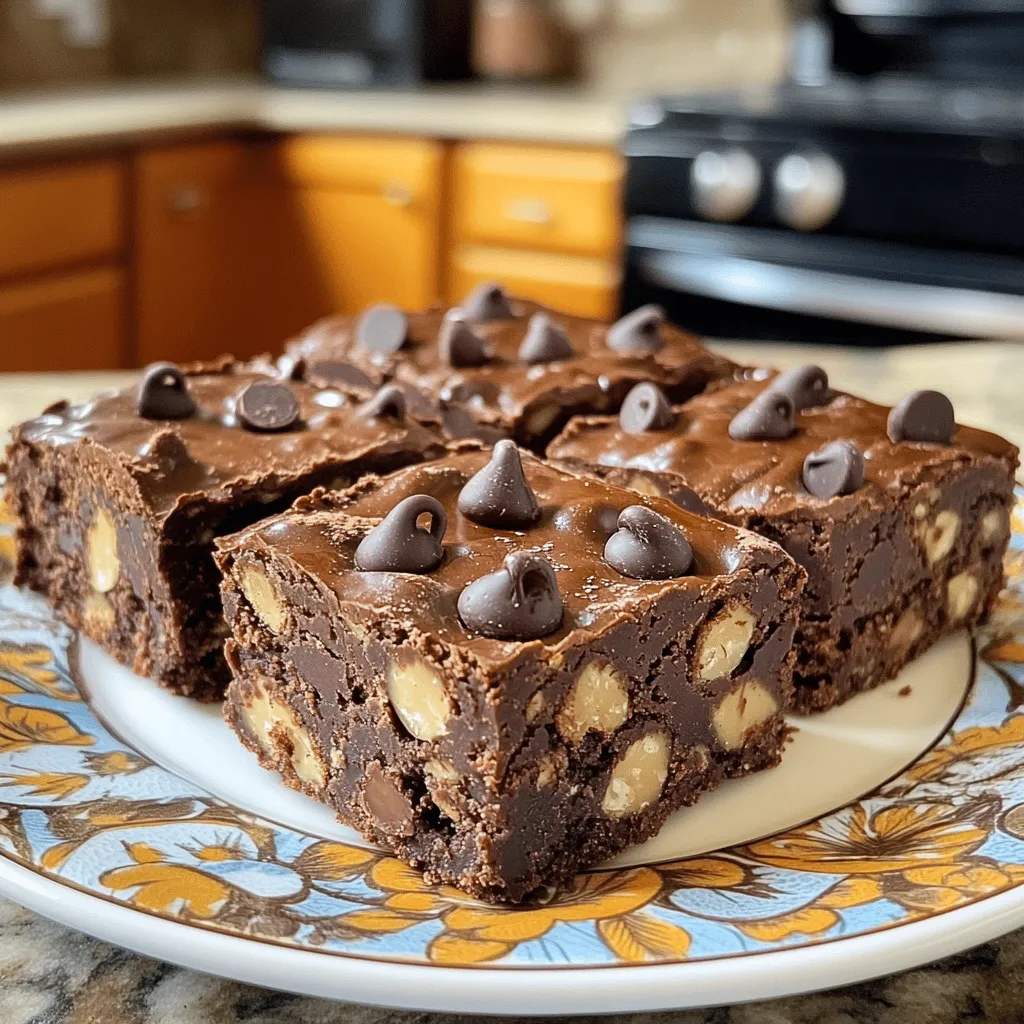
Pour the batter into the lined pan. Use a spatula to spread it evenly. Smooth the top to make it nice. Place the pan in the oven and bake for 20 to 25 minutes. The edges should be light golden brown. A toothpick inserted in the center should come out mostly clean. After baking, let the bars cool in the pan for about 10 minutes. Use the parchment paper to lift them out. Move them to a wire rack to cool completely. Once cooled, slice the bars into squares for serving. Enjoy their chewy, rich texture!
Tips & Tricks
How to Achieve the Perfect Texture
To get the best texture, use creamy peanut butter. It blends well and gives a smooth base. Ensure you mix the peanut butter and brown sugar until smooth. This step helps to create a rich and creamy batter. When adding eggs, mix them in one at a time. This keeps your batter even and helps with fluffiness. Don’t overmix after adding the chocolate chips; just fold them in gently.
Common Mistakes to Avoid
One common mistake is not measuring the brown sugar correctly. Too much sugar can make your bars too sweet. Another mistake is not letting the bars cool fully before cutting. If you cut them too soon, they may crumble. Also, watch the baking time closely. Every oven is different, so check the bars early to avoid overbaking.
Best Practices for Cutting and Serving
To cut the bars neatly, use a sharp knife. Run the knife under hot water for cleaner cuts. Let the bars cool on a wire rack for about 10 minutes before lifting them out. Once cool, slice into squares for serving. For a beautiful presentation, arrange the bars on a nice plate. You can add a light dusting of cocoa powder or extra chocolate chips on top for flair.
Variations
Gluten-Free Options
These bars are already gluten-free! The main ingredient is peanut butter, which is naturally gluten-free. If you want to ensure your bars fit strict gluten-free diets, check your peanut butter label. Some brands may add ingredients that contain gluten.
Flavor Variations
You can easily change the flavor of these bars. Try adding shredded coconut for a tropical twist. Chopped almonds or pecans can add a nice crunch too. You can even swap in different chocolate chips, like white or milk chocolate. Each choice adds a new taste to enjoy.
Healthier Swaps for Ingredients
If you want a lighter version, you can reduce the sugar. Try using just 1/2 cup of brown sugar. You can also replace some peanut butter with unsweetened applesauce. This swap cuts fat while keeping the bars moist. For a nut-free option, use sunflower seed butter instead of peanut butter. Your bars will still be tasty and satisfying!
Storage Info
Best Practices for Storing Leftovers
To keep your flourless peanut butter chocolate chip bars fresh, store them in an airtight container. Place a piece of parchment paper between layers to prevent sticking. They stay tasty for about five days at room temperature. If you want to keep them longer, refrigeration works well too. Just remember to let them cool completely before sealing.
Freezing Instructions for Long-Term Storage
If you want to save some for later, freezing is a great option. Cut the bars into squares first. Wrap each square tightly in plastic wrap, then place them in a freezer-safe bag. They can last up to three months in the freezer. When you want to enjoy one, just thaw it in the fridge overnight or at room temperature for a couple of hours.
Reheating Tips to Maintain Freshness
When it’s time to eat a stored bar, reheating can bring back that fresh texture. Pop it in the microwave for about 10-15 seconds. This warms it up without making it dry. Enjoy it warm to savor the melted chocolate chips and the rich peanut butter flavor!
FAQs
Can I use a different nut butter?
Yes, you can use other nut butters. Almond butter or cashew butter work well. Each nut butter has its own taste. This can change the flavor of the bars. If you want to try something new, go for it!
What are the nutritional benefits of these bars?
These bars have great nutrition. They are high in protein from the peanut butter. This helps build and repair muscles. They also contain healthy fats that give you energy. The dark chocolate adds antioxidants. This means they can be a tasty treat that offers some health benefits too.
How long do they last at room temperature?
These bars can last about 3 to 5 days at room temperature. Store them in an airtight container. This keeps them fresh and chewy. If you live in a warm place, it’s best to keep them in the fridge.
Can I make these bars vegan?
Yes, you can make these bars vegan! Simply swap the eggs for flax eggs. Mix 1 tablespoon of ground flaxseed with 3 tablespoons of water. Let it sit for a few minutes until it thickens. This works great in the recipe and keeps the bars moist.
You learned how to make delicious flourless peanut butter chocolate chip bars. We covered key ingredients, optional add-ins, and substitutions. You now know the step-by-step process, helpful tips, and variations to try. Proper storage and reheating methods keep these treats fresh. With this guide, you can bake with confidence. Enjoy tasty bars that fit your needs and preferences!


