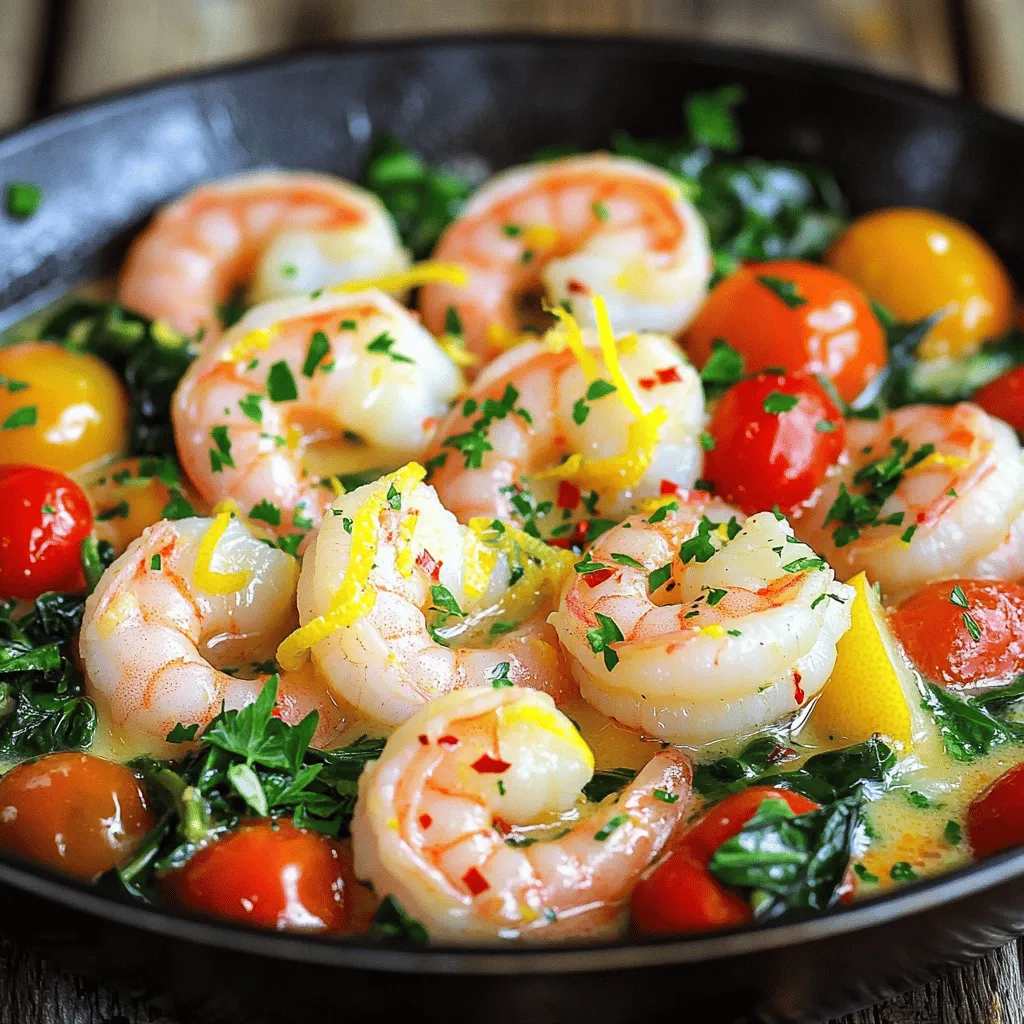
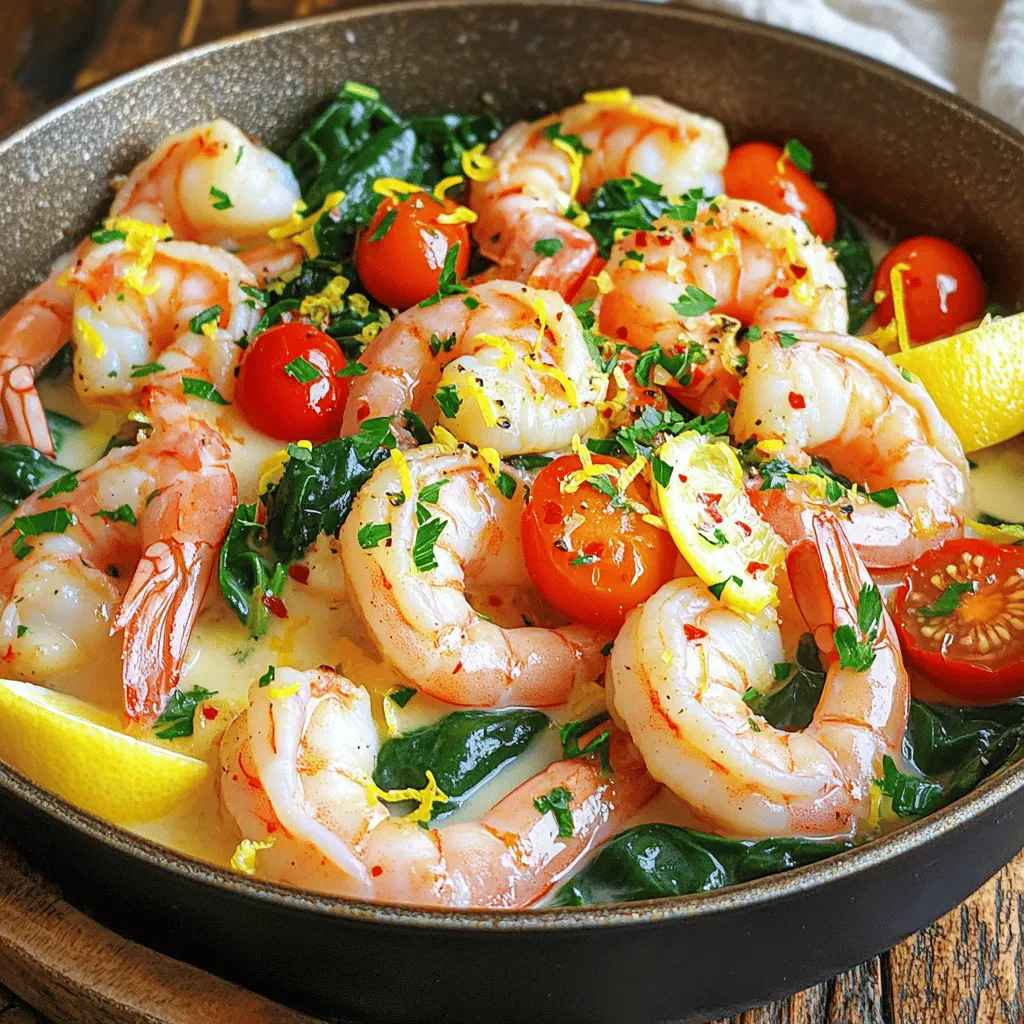
Are you ready to whip up a delicious meal in just 20 minutes? This Lemon Garlic Butter Shrimp Skillet is quick, easy, and packed with flavor. With juicy shrimp, fresh veggies, and a burst of lemon, it makes for the perfect weeknight dinner. In this post, I’ll share the full recipe, tips for success, and fun variations to try. Let’s dive in and elevate your dinner game!
Ingredients
Main Ingredients
– 1 pound large shrimp, peeled and deveined
– 3 tablespoons unsalted butter
– 4 cloves garlic, minced
– Zest and juice of 1 lemon
Seasonings and Additions
– 1 teaspoon red pepper flakes
– Sea salt and freshly ground black pepper
– 2 tablespoons fresh parsley, finely chopped
Vegetables
– 1 cup cherry tomatoes, halved
– 1 cup baby spinach
When I make Lemon Garlic Butter Shrimp Skillet, I start with fresh shrimp. Large shrimp work best. They cook fast and stay juicy. I peel and devein them to keep the dish clean and easy to eat.
Next, I grab my unsalted butter. It adds richness and flavor. I use three tablespoons, which is just right. Then, I chop four cloves of garlic. Garlic adds a warm, aromatic taste. I love the smell when it cooks.
I zest one lemon. The zest gives a bright note to the dish. I also squeeze out the juice to add a tangy kick.
For seasoning, I sprinkle in one teaspoon of red pepper flakes. This adds a nice heat, but you can adjust it. A pinch of sea salt and freshly ground black pepper brings balance to the flavors.
I like to add fresh parsley for color and flavor. Chopping two tablespoons brings a fresh taste to the dish.
To finish, I use cherry tomatoes and baby spinach. I halve one cup of cherry tomatoes to add sweetness. The baby spinach wilts nicely and adds a pop of green.
All these ingredients come together for a quick and tasty meal. Each bite is filled with flavor and freshness.
Step-by-Step Instructions
Preparing the Base
Start by heating a large skillet over medium heat. Add 3 tablespoons of unsalted butter to the skillet. Watch closely as the butter melts and begins to foam. This step is key for flavor.
Next, add 4 minced garlic cloves to the skillet. Sauté the garlic for about one minute. Stir it often until it becomes aromatic and slightly golden. Be careful not to let it burn. Burnt garlic can taste bitter and ruin your dish. After that, mix in 1 teaspoon of red pepper flakes and the zest of one lemon. Cook for another 30 seconds to let those flavors blend nicely.
Cooking the Shrimp
Now, it’s time to add the shrimp! Place 1 pound of peeled and deveined shrimp into the skillet. Season them generously with sea salt and freshly ground black pepper. Cook the shrimp for 2 to 3 minutes on one side. You want to see them start turning pink. This means they are cooking well.
After that, carefully flip the shrimp over. Pour in 2 tablespoons of fresh lemon juice. This adds a bright flavor. Add 1 cup of halved cherry tomatoes and 1 cup of baby spinach to the skillet. Stir gently to mix everything together. Cook for another 2 to 3 minutes. The shrimp should be fully cooked, opaque, and pink. The spinach will wilt down, adding a nice touch.
Incorporating Veggies
As the shrimp and veggies cook, keep an eye on them. The tomatoes should soften, and the spinach should wilt. This creates a colorful and tasty mix. Once everything looks good, remove the skillet from heat. Sprinkle 2 tablespoons of finely chopped fresh parsley over the top for a burst of color and flavor. Enjoy your delicious Lemon Garlic Butter Shrimp Skillet!
Tips & Tricks
Perfecting the Recipe
To get the best flavor, avoid burnt garlic. Cook the garlic just until it turns golden. If it burns, it will taste bitter. Keep an eye on it while it cooks.
You can adjust the red pepper flakes to fit your taste. Start with one teaspoon. If you like more heat, add a bit more. It’s easy to add heat, but hard to take it away.
Serving Suggestions
When serving, you can use the skillet for a rustic look. A bright platter also works well. Garnish with parsley and fresh lemon wedges for color.
For a filling meal, pair it with crusty bread. The bread is perfect for soaking up the buttery sauce. You can also serve this dish over fluffy rice for a complete meal.
Common Mistakes to Avoid
One common mistake is overcooking the shrimp. They only need about 2-3 minutes on each side. They should be opaque and pink when done. If you cook them too long, they will become tough.
Another mistake is not prepping your ingredients first. Make sure to have everything ready before you start cooking. This makes the process smooth and easy.
Variations
Protein Swaps
You can switch the shrimp for chicken or scallops. Chicken works well, too. Just cut it into small pieces and cook until it’s no longer pink. Scallops have a lovely sweet flavor that pairs nicely with the lemon and garlic. For a vegetarian option, use firm tofu. Press it to remove excess water, then cut it into cubes. Sauté it just like the shrimp for a tasty twist.
Flavor Modifications
Want to change up the taste? Try adding a splash of white wine while cooking. This adds depth and brings out the flavors. You can also mix in different herbs like basil or thyme. They give a fresh taste. Another fun idea is to experiment with citrus zests. Try orange or lime for a new flavor profile.
Dietary Adjustments
For low-carb or gluten-free diets, skip the bread and rice. You can serve this dish with zucchini noodles or cauliflower rice instead. If you’re looking for dairy-free options, use olive oil or coconut oil in place of butter. This keeps it rich and creamy without dairy.
Storage Info
Refrigeration Guidelines
To store leftovers safely, place the shrimp in an airtight container. Make sure it closes well. This keeps the shrimp fresh and prevents odors. You can store the shrimp in the fridge for up to three days.
I recommend using glass or plastic containers that seal tightly. These containers are easy to clean and reuse.
Reheating Instructions
The best method for reheating shrimp is using a skillet. Heat it over low to medium heat. Add a splash of water or broth to keep moisture. Stir gently as it heats.
To keep the shrimp from becoming rubbery, avoid cooking too long. Shrimp cooks quickly, so check often. They are done when they turn pink and opaque.
Freezing Information
You can freeze this dish for later use. Allow the shrimp to cool completely before freezing. Place them in a freezer-safe bag or container. Remove as much air as possible. This helps avoid freezer burn.
When you’re ready to eat, thaw the shrimp in the fridge overnight. Reheat in a skillet as mentioned above. This method keeps the flavor and texture just right.
FAQs
How long does it take to cook shrimp in a skillet?
Cooking shrimp in a skillet takes about 6 to 8 minutes. Start by cooking shrimp for 2 to 3 minutes on one side. When they turn pink, flip them over. Then, cook for another 2 to 3 minutes. The shrimp should look opaque and firm. Timing is key for the best shrimp.
Can I use frozen shrimp for this recipe?
Yes, you can use frozen shrimp! Just make sure to thaw them first. You can do this by placing them in the fridge overnight. If you’re in a hurry, rinse them under cold water for about 5 to 10 minutes. This helps keep the shrimp fresh and tender. Fresh shrimp can add a better taste, but frozen works well too.
What is the best way to prevent shrimp from becoming rubbery?
To prevent rubbery shrimp, do not overcook them. Cook them just until they turn pink and opaque. Also, make sure your skillet is hot enough. If it’s too cool, the shrimp will cook slowly and become tough. Lastly, use good quality shrimp; fresh or well-thawed shrimp will yield the best results.
This blog post covered a delightful shrimp dish full of flavor and easy steps. We explored the ingredients, from fresh shrimp to vibrant veggies. I shared tips to perfect your cooking and avoid common mistakes. You can modify the recipe to fit your taste and diet. Storage info ensures your leftovers stay fresh. Enjoy creating this dish and impressing your family and friends with your cooking skills. Remember, cooking should be fun, so feel free to experiment!