

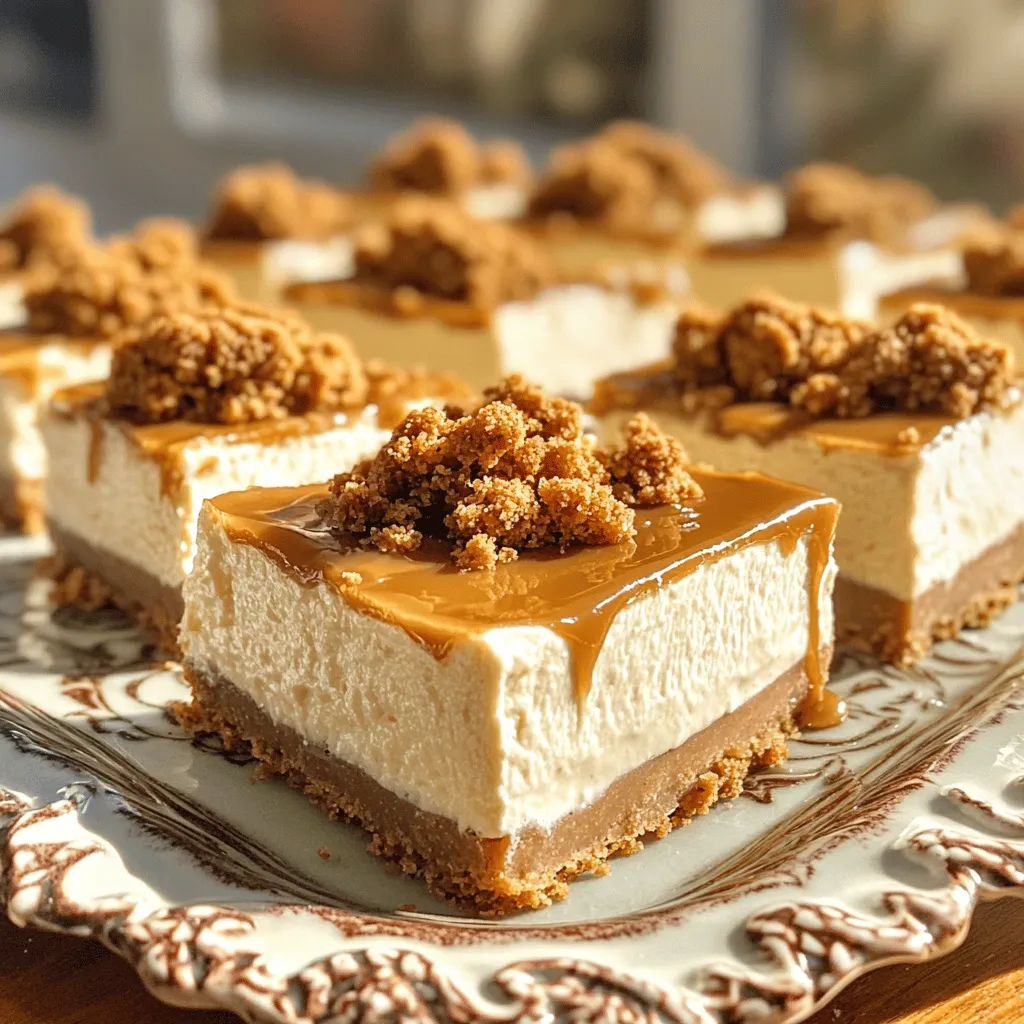
Looking for a dessert that’s rich, creamy, and unbelievably simple? You’ve hit the jackpot with these No-Bake Biscoff Cheesecake Bars! Made with your favorite Biscoff cookies and a few easy ingredients, this treat is perfect for any occasion. I’ll walk you step-by-step through the process to create a smooth and decadent cheesecake that will impress anyone who tries it. Get ready to tease your taste buds!
Ingredients
Main Ingredients
– 200g Biscoff cookies (plus extra for garnish)
– 100g unsalted butter, melted
– 400g cream cheese, softened to room temperature
– 200ml heavy cream
– 100g powdered sugar, sifted
– 150g Biscoff spread
– 1 teaspoon vanilla extract
– A pinch of sea salt
Garnish Ingredients
– Additional Biscoff cookies for garnish
Each ingredient plays a vital role in making No-Bake Biscoff Cheesecake Bars a delight.
Biscoff cookies form the base and add rich flavor. They give the bars a unique taste and a great crunch.
Unsalted butter helps bind the cookie crumbs together, making a sturdy crust.
Cream cheese is the heart of the cheesecake filling. It gives a rich and creamy texture that melts in your mouth.
Heavy cream adds fluffiness to the filling. Whipped to stiff peaks, it makes the cheesecake light and airy.
Powdered sugar sweetens the mix without adding graininess. It blends smoothly with the cream cheese.
Biscoff spread enhances the flavor profile. Its caramel notes deepen the taste, making every bite a treat.
Vanilla extract offers warmth and balance, rounding out the flavors beautifully.
Sea salt elevates all the flavors and balances the sweetness, making the bars even more delicious.
For garnishing, you can use additional Biscoff cookies. Crumbling them on top not only adds visual appeal but also extra crunch and flavor.
Each ingredient contributes to making these bars smooth, creamy, and irresistible.
Step-by-Step Instructions
Preparing the Base
Start by crushing the Biscoff cookies. You can use a food processor or place them in a plastic bag and crush them with a rolling pin. Aim for fine crumbs. Once crushed, pour the crumbs into a bowl. Next, add the melted butter to the crumbs. Stir until the mixture looks like wet sand.
Creating the Crust
Take a 9×9-inch baking pan and line it with parchment paper. This helps with easy removal later. Pour the cookie mixture into the pan. Use the back of a measuring cup or your hands to press it down firmly. Make sure it is even and compact. Place the pan in the fridge to set while you make the filling.
Making the Cheesecake Filling
In a large bowl, beat the softened cream cheese with an electric mixer. Mix it until smooth and creamy. Gradually add the sifted powdered sugar and vanilla extract. Continue to beat until everything is mixed well and there are no lumps. This step is key for a smooth filling.
Next, incorporate the Biscoff spread into the cream cheese mixture. Use a spatula to fold it in gently. Be careful not to overmix. We want to keep the light texture of the filling.
Combining the Mixtures
In a separate bowl, whip the heavy cream until stiff peaks form. This adds airiness to your filling. Once whipped, carefully fold the whipped cream into the Biscoff mixture in three parts. Start with a third of the whipped cream to make it lighter. Then, gently fold in the rest until just combined.
Assembling the Bars
Pour the cheesecake filling over the chilled crust. Use a spatula to spread it evenly. Smooth the top for a nice finish. This step helps your bars look great when served.
Chilling and Serving
Cover the pan tightly with plastic wrap. Refrigerate it for at least four hours. For the best flavor, let it chill overnight. Once set, use a sharp knife to slice the cheesecake into bars. For a nice touch, crumble extra Biscoff cookies on top as a garnish. Enjoy your delicious creation!
Tips & Tricks
Perfecting Your Cheesecake Texture
Using room temperature ingredients is key for a smooth cheesecake. Cold cream cheese mixes poorly and can lead to lumps. Let your cream cheese sit out for about 30 minutes before you start. This simple step makes a big difference.
When it comes to folding whipped cream into your mixture, gently is the way to go. Use a spatula and a big bowl. Start by adding a third of the whipped cream to the cheesecake mix. This lightens it up. Then, fold in the rest in two more parts. Be careful not to stir too hard. You want to keep all that air you just whipped in.
Presentation Tips
For a beautiful display, use a nice platter to serve your cheesecake bars. An attractive serving plate can really enhance your dessert.
Drizzling melted Biscoff spread on top adds a lovely touch. It makes the bars look inviting and adds extra flavor. Sprinkle some crushed Biscoff cookies on top for a final flourish. This not only looks good but also gives a nice crunch with each bite.
Variations
Flavor Variations
You can easily change up the flavor of your No-Bake Biscoff Cheesecake Bars. Here are some fun ideas:
– Adding chocolate or caramel swirls: Drizzle some melted chocolate or caramel on top of the cheesecake filling before it sets. Use a toothpick to swirl it in. This adds a rich taste and looks great.
– Incorporating nuts for crunch: Try adding chopped walnuts or pecans to the crust. This gives a nice crunch and pairs well with the creamy filling. You can also sprinkle nuts on top for a finishing touch.
Alternative Dietary Options
If you have dietary needs, there are ways to adapt this recipe:
– Gluten-free versions: Use gluten-free Biscoff cookies or any gluten-free cookie you like. Just check the labels to make sure they fit your needs.
– Dairy-free substitutions: For a dairy-free cheesecake, swap the cream cheese for a dairy-free version. You can use coconut cream instead of heavy cream too. This keeps the creamy texture while making it suitable for dairy-free diets.
Storage Info
How to Store Leftovers
To keep your No-Bake Biscoff Cheesecake Bars fresh, store them in an airtight container. This helps prevent the bars from drying out or absorbing other odors from your fridge. You can use a glass or plastic container with a tight lid. Make sure to place a layer of parchment paper between the bars and the lid. This way, they won’t stick, and you can easily lift them out when serving. Stored this way, your cheesecake bars can last for up to a week in the fridge.
Freezing Instructions
If you want to save some bars for later, you can freeze them. First, cut the cheesecake into individual bars. Wrap each bar tightly in plastic wrap and then place them in a freezer-safe bag or container. This extra layer protects them from freezer burn. They can last in the freezer for up to three months.
When you want to enjoy a bar, simply remove it from the freezer. Let it thaw in the fridge for several hours or overnight. This keeps the texture smooth and creamy. Serve chilled for the best taste.
FAQs
Can I use other types of cookies for the crust?
Yes, you can use other cookies. Graham crackers or Oreos work well. Just crush them fine and mix with melted butter. The taste will change, but it can still be delicious.
How long do these cheesecake bars last in the fridge?
These cheesecake bars last about five days in the fridge. Just keep them covered to stay fresh. They taste best within the first few days.
Can I make this recipe ahead of time?
Absolutely! You can prepare these bars a day or two ahead. Just let them chill well in the fridge. This waiting time helps the flavors blend beautifully.
What’s the best way to reheat leftover cheesecake?
You don’t need to reheat these bars. They taste great cold. If you want them softer, take them out of the fridge for a few minutes before serving.
Is it necessary to use heavy cream?
Using heavy cream is key for a light texture. It helps make the filling fluffy. If you skip it, the cheesecake may be dense and less creamy.
This blog post covered a delicious Biscoff cheesecake bar recipe. You learned about the key ingredients and each step to make the perfect bars. From mixing the crust to chilling the final product, you now know how to impress your friends and family. Consider the tips for making your cheesecake even better. Feel free to explore flavor variations and dietary options. Enjoy your sweet treat and have fun creating! These cheesecake bars are sure to delight everyone.


