
If you crave a sweet treat that’s easy to make, these No-Bake Oreo Cheesecake Bars are perfect for you. With just a few simple ingredients, you can whip up a delicious dessert that everyone will love. No baking, no fuss! Just mix, chill, and enjoy. I’ll guide you through each step, so let’s dive into this creamy, dreamy recipe and indulge in a bite of bliss!
Ingredients
List of Main Ingredients
– 24 Oreo cookies
– 4 tablespoons unsalted butter
– 16 oz cream cheese
– 1 cup powdered sugar
– 1 teaspoon vanilla extract
– 2 cups heavy whipping cream
Optional Ingredients
– Cocoa powder (for garnish)
– Additional Oreo cookies (for garnish)
– Pinch of salt
To make these No-Bake Oreo Cheesecake Bars, gather all your main ingredients first. You need 24 Oreo cookies for the crust. Crush these into fine crumbs. Mix the crumbs with 4 tablespoons of melted unsalted butter. This will help form a strong base.
Next, you need 16 ounces of cream cheese. Make sure it is softened to room temperature. This helps it blend smoothly. Add 1 cup of powdered sugar and 1 teaspoon of vanilla extract. This mixture will give your cheesecake a sweet and rich flavor.
Finally, you’ll need 2 cups of cold heavy whipping cream. This helps create a light and fluffy texture. For an extra touch, consider cocoa powder and more Oreo cookies for garnish. A pinch of salt can enhance the flavors too.
These ingredients create a delicious treat that is easy to make and hard to resist.
Step-by-Step Instructions
Preparing the Crust
1. First, place the 24 Oreo cookies in a food processor. Pulse them until they turn to fine crumbs. This is easy and quick.
2. In a mixing bowl, combine the Oreo crumbs with 4 tablespoons of melted butter. Mix well until it holds together when pressed.
3. Line an 8×8-inch baking pan with parchment paper. Leave some overhang for easy removal later. Firmly press the crumb mixture into the bottom of the pan using a flat measuring cup.
4. Put the pan in the refrigerator to chill while you prepare the cheese mixture.
Making the Cheese Mixture
1. In a large bowl, beat 16 ounces of softened cream cheese with an electric mixer. Mix until it is smooth and free of lumps.
2. Gradually add 1 cup of powdered sugar and 1 teaspoon of vanilla extract. Keep mixing until everything is fully blended and creamy.
Whipping the Cream
1. Pour 2 cups of cold heavy whipping cream into a separate bowl. Use a mixer to whip it until stiff peaks form. This means the cream can hold its shape.
2. Carefully fold the whipped cream into the cream cheese mixture with a spatula. Make sure to keep it light and airy. Stop when you no longer see streaks.
Combining and Chilling
1. Pour the fluffy cream cheese mixture over the chilled Oreo crust. Use a spatula to spread it evenly.
2. Smooth the top for a nice finish. Cover the pan tightly with plastic wrap.
3. Refrigerate for at least 4 hours, or until the cheesecake bars are firm to the touch.
Tips & Tricks
Tips for Perfecting the Recipe
– Ensure cream cheese is at room temperature: This step helps the cream cheese blend smoothly. Cold cream cheese can make lumps in your mixture.
– Achieve the right consistency for whipped cream: Whip the cream until stiff peaks form. This means it holds its shape well. If you over-whip, it can turn grainy.
– Press the crust firmly: Make sure to pack the crushed Oreos tightly in the pan. This keeps the crust from crumbling when you cut the bars.
Serving Suggestions
– How to cut into bars: Use a sharp knife for clean cuts. Wipe the knife with a damp cloth after each cut to keep edges neat.
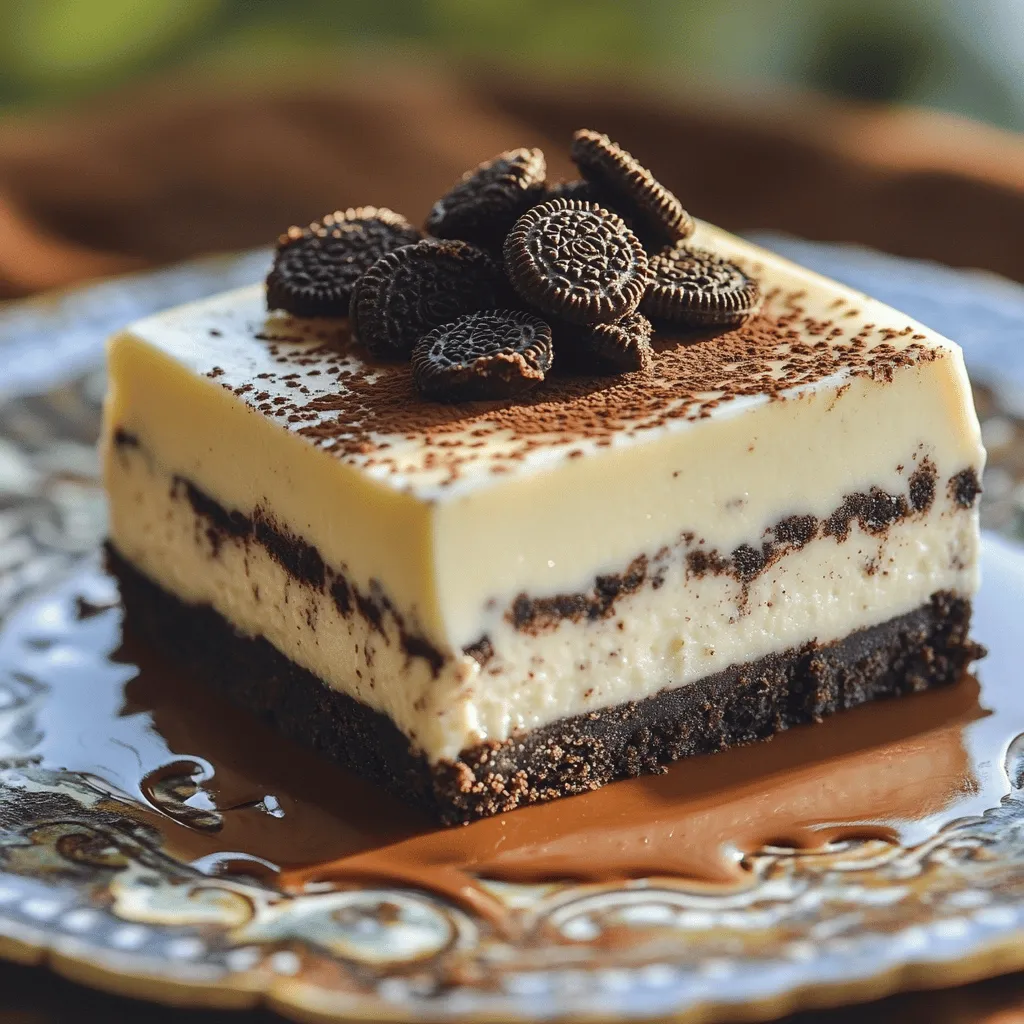
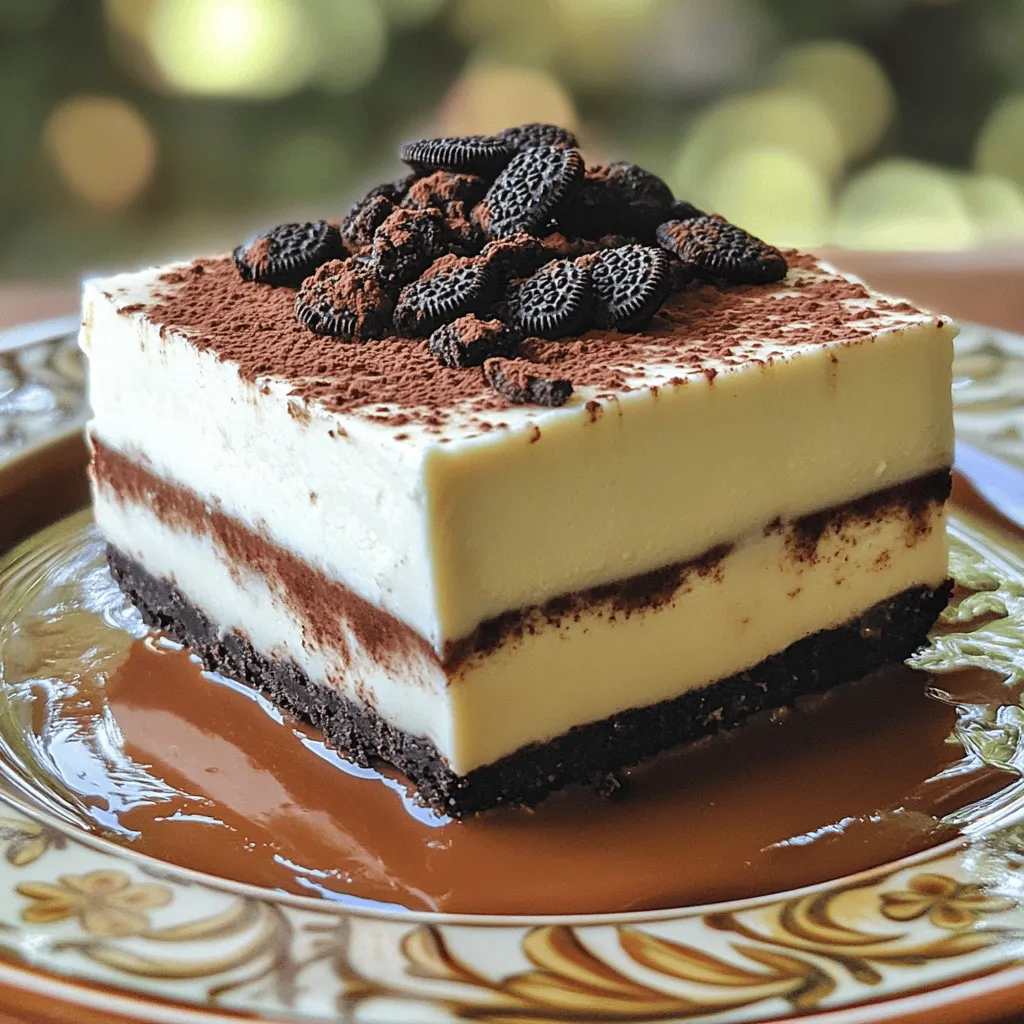
– Presentation ideas with garnish: Sprinkle crushed Oreo cookies on top for a pop of color. Add a dusting of cocoa powder for a nice touch.
– Accompaniments like chocolate sauce: Drizzle chocolate sauce over the bars before serving. It gives an extra layer of flavor and looks great.
Common Mistakes to Avoid
– Overmixing the cream cheese: Mix just until smooth. Overmixing can lead to a dense filling instead of light and fluffy.
– Not chilling long enough: Be patient and chill for at least 4 hours. This helps the bars set properly.
– Using warm ingredients: Always use cold heavy cream and room-temperature cream cheese. Warm ingredients can affect the texture of the filling.
Variations
Flavor Variations
You can change the flavor of your Oreo cheesecake bars easily. Add a few drops of almond or mint extract to the cheese mixture for a twist. These flavors give a fun twist to the classic taste. You can also add melted chocolate. Just mix it in when you combine the cream cheese. If you like fruit, fold in some crushed berries. Strawberries or raspberries add a fresh taste.
Ingredient Substitutions
If you want to switch things up, you can use alternatives for cream cheese. Greek yogurt gives a lighter option. You could also try mascarpone for a creamier texture. For those who need a gluten-free option, use gluten-free Oreo cookies. They taste just as good and keep the bars delicious.
Serving Size Adjustments
You can easily adjust the serving size for your needs. If you want to make more, just double the recipe. This is great for parties! If you need fewer bars, cut the ingredients in half. This way, you can enjoy a smaller batch without waste. Just remember to adjust the chilling time if you change the size.
Storage Info
Best Storage Practices
To keep your No-Bake Oreo Cheesecake Bars fresh, store them in the refrigerator. Place the bars in an airtight container. This keeps them safe from smells and moisture. If you don’t have a container, use plastic wrap. Wrap the bars tightly to prevent drying out.
Freezing Instructions
You can freeze the cheesecake bars for later. Cut them into squares before freezing. Place the bars in a single layer on a baking sheet. Freeze them until solid. Then, transfer them to an airtight container or freezer bag. For the best texture, thaw the bars in the fridge overnight before serving. This keeps them creamy and delicious.
Shelf Life
These cheesecake bars can last up to one week in the fridge. If frozen, they stay good for about three months. Enjoy them fresh for the best taste, but they still taste great after freezing!
FAQs
How long do No-Bake Oreo Cheesecake Bars need to chill?
These No-Bake Oreo Cheesecake Bars need to chill for at least 4 hours. I recommend chilling them overnight for the best results. This helps the filling set properly, making it easier to cut and serve. The longer they chill, the better the flavors meld together.
Can I make these cheesecake bars in advance?
Yes, you can make these cheesecake bars in advance. They store well in the fridge for up to 5 days. Just cover them tightly with plastic wrap or place them in an airtight container. This makes them a great treat for parties or special occasions.
What is the best way to cut cheesecake bars?
To cut the cheesecake bars, use a sharp knife. Dip the knife in hot water and wipe it clean before each cut. This technique helps create clean edges. You can also run the knife under warm water, which makes cutting easier.
Is it possible to use low-fat cream cheese?
Yes, you can use low-fat cream cheese. However, the texture may be a bit different. The bars might not be as creamy or rich as using full-fat cream cheese. If you prefer a lighter option, this is a good choice.
How do I fix a runny cheesecake filling?
If your cheesecake filling is runny, try adding more cream cheese. Beat it in until smooth. You can also chill the mixture for a bit before spreading it on the crust. This helps it set better and become more stable.
This article covered how to make delicious No-Bake Oreo Cheesecake Bars. We discussed key ingredients, detailed step-by-step instructions, and shared valuable tips to ensure your success. Remember to chill your dessert well and avoid common mistakes. Whether you choose to mix in flavors or stick to the classic recipe, these bars are sure to impress. Enjoy your cheesecake bars and share them with friends and family for a tasty treat!


