
Are you craving a quick and tasty treat? These No-Bake Peanut Butter Bars hit the spot! They’re easy to make, need simple ingredients, and require no oven. In just a few steps, you’ll have delicious bars ready to enjoy. Follow me, and let’s whip up a treat that’s perfect for snacks or dessert!
Ingredients
Key Ingredients for No-Bake Peanut Butter Bars
To make these tasty bars, you need a few key items:
– 1 cup creamy peanut butter
– 1/2 cup honey or maple syrup
– 2 cups rolled oats
– 1/2 cup almond flour
– 1/4 cup unsweetened cocoa powder
– 1/4 cup chocolate chips (optional)
– 1 teaspoon vanilla extract
– A pinch of sea salt
These ingredients come together to create a rich and delicious treat. The creamy peanut butter gives a smooth texture. Honey or maple syrup adds sweetness and helps bind everything. Rolled oats provide a chewy base, while almond flour adds nutty flavor. Cocoa powder makes the bars chocolatey.
Optional Ingredients for Customization
You can get creative with your bars. Here are some optional ingredients:
– Dried fruits like cranberries or raisins
– Chopped nuts for extra crunch
– A sprinkle of sea salt on top
Adding these ingredients can change the flavor and texture. For example, nuts add crunch, while dried fruits add sweetness.
Notes on Ingredient Substitutions
You can easily swap some ingredients based on what you have:
– Use natural peanut butter instead of creamy for a more rustic flavor.
– Swap honey for agave syrup if you prefer a vegan option.
– Oats can be replaced with a gluten-free option if needed.
These substitutions keep the essence of the bars while fitting your needs. Always aim for ingredients you enjoy to make the bars truly yours.
Step-by-Step Instructions
Preparing the Peanut Butter Mixture
Start by grabbing a medium saucepan. Set your stove to low heat. Add 1 cup of creamy peanut butter and 1/2 cup of honey or maple syrup. Stir the mix constantly until it melts and becomes smooth. This step ensures a tasty base for your bars. Once melted, take the saucepan off the heat. Next, stir in 1 teaspoon of vanilla extract and a pinch of sea salt. Mix well to blend all the flavors together.
Combining Dry Ingredients
Now, grab a large mixing bowl. Add 2 cups of rolled oats, 1/2 cup of almond flour, and 1/4 cup of unsweetened cocoa powder. Use a whisk or spoon to mix these dry ingredients thoroughly. You want them evenly blended for the best taste. This step adds texture and a rich flavor to your bars.
Pressing and Chilling the Mixture
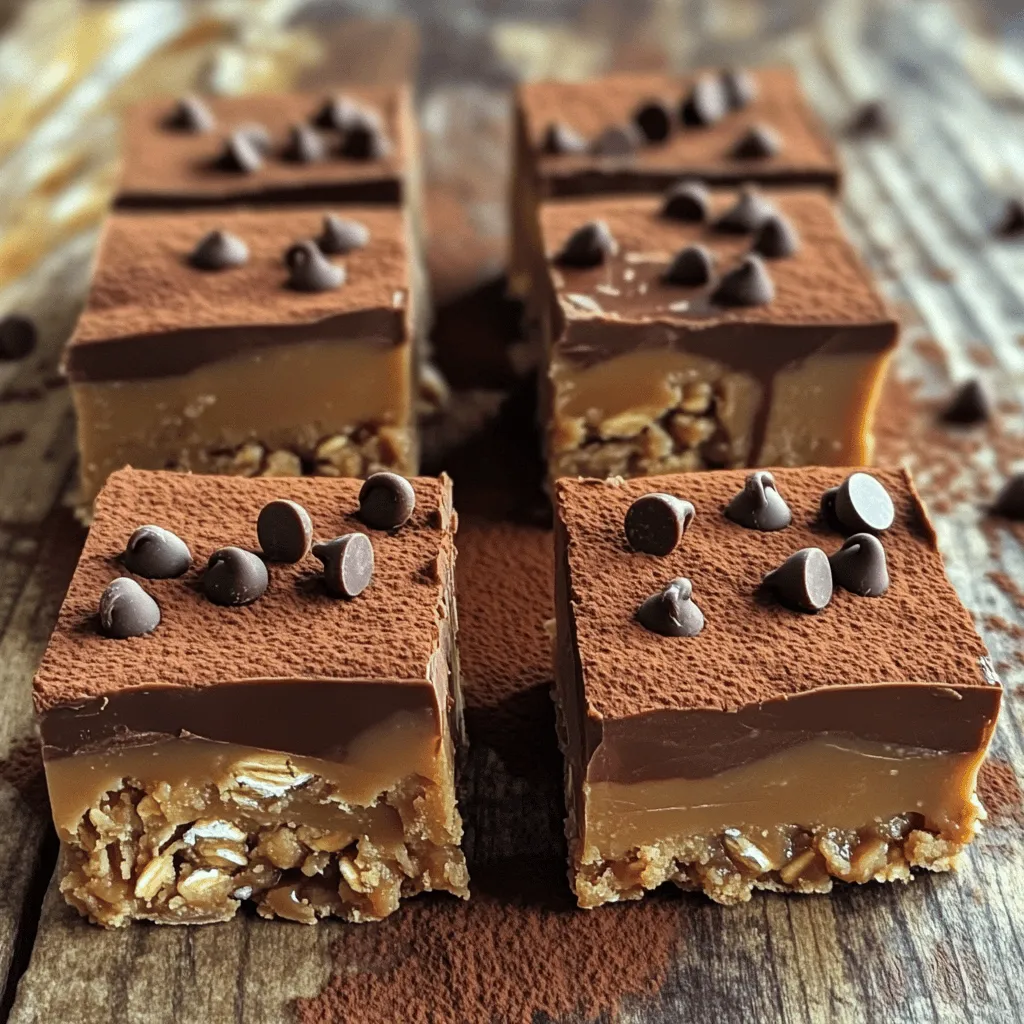
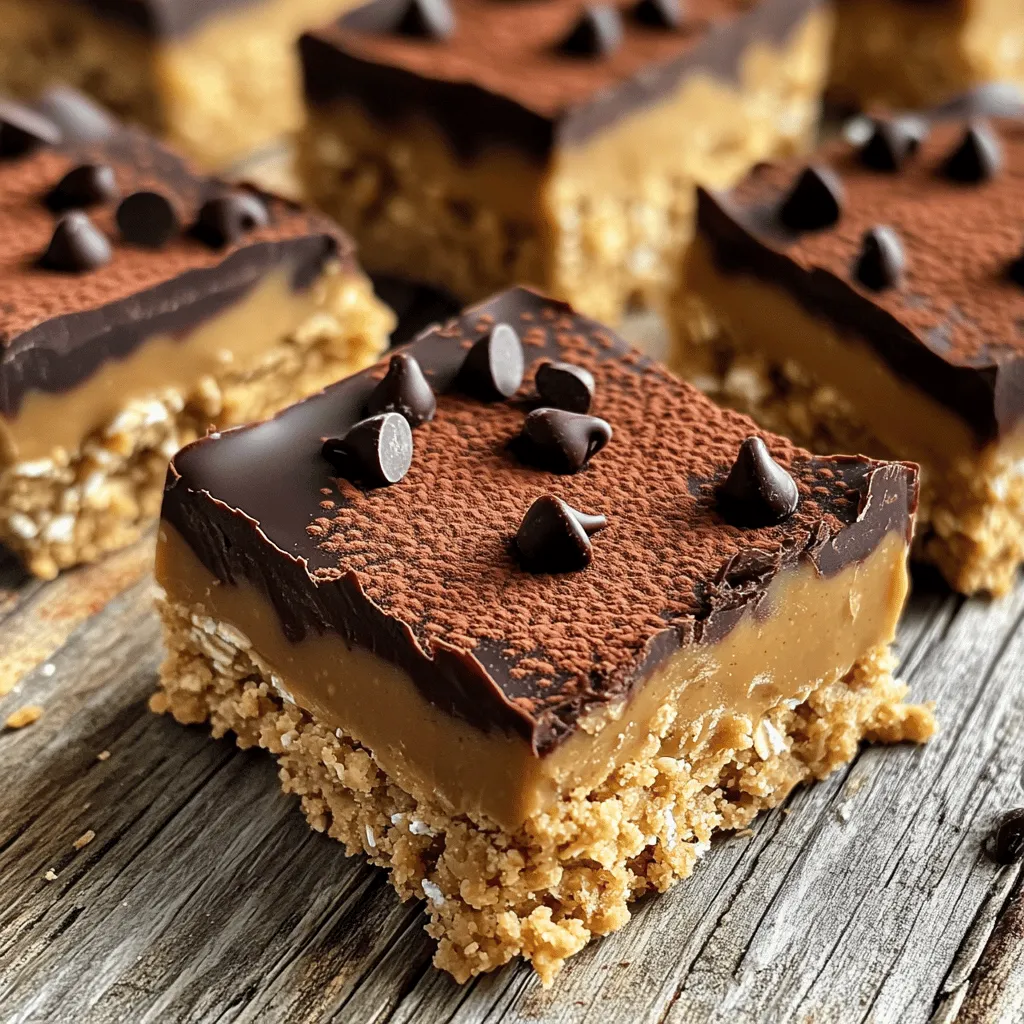
You will need an 8×8 inch square baking dish for this part. Line it with parchment paper, letting some paper hang over the sides. This helps with easy removal later. Pour the warm peanut butter mix into the bowl with the dry ingredients. Stir until everything is fully coated. If you want a sweeter touch, fold in 1/4 cup of chocolate chips now. Transfer the mixture into the prepared baking dish. Use a spatula or your hands to press it down firmly and evenly. This step is crucial for a nice texture. Place the dish in the fridge for at least 1 hour. This chilling time helps the bars set and become firm. Once chilled, lift the bars out using the parchment paper. Cut them into squares of your choice. Enjoy your creation!
Tips & Tricks
Perfecting the Texture of Your Bars
To get the best texture, use creamy peanut butter. It mixes well and keeps the bars smooth. When you melt the peanut butter, do it slowly. Low heat helps to avoid burning. After mixing, press the mixture firmly into the dish. This step helps the bars stay together. If they are too crumbly, add a bit more honey or maple syrup. This will bind the ingredients better.
Serving Suggestions and Presentation Tips
For serving, cut the bars into even squares. This makes them easy to grab. Place them on a nice platter. You can sprinkle extra chocolate chips on top for a fun look. For a fancy touch, drizzle melted chocolate over each bar. This gives a nice shine and adds flavor. Serve them cold for a refreshing treat on a warm day.
Common Mistakes to Avoid
One common mistake is not pressing the mixture down enough. If it’s loose, bars may crumble. Another mistake is using too much heat when melting. This can change the flavor and texture. Be careful with ingredient measurements. Too much cocoa powder can make them bitter. Finally, don’t skip chilling the bars. They need time to set properly before cutting.
Variations
Different Flavors to Try
You can switch up the flavor of your no-bake peanut butter bars easily. Add in some vanilla protein powder for a boost. You can also swap out the cocoa powder for carob powder if you want a different taste. Try using almond butter instead of peanut butter for a nutty twist. You can even add a splash of peppermint extract for a fresh surprise.
Adding Extra Ingredients for a Twist
Mix in some dried fruit like cranberries or raisins for extra sweetness. You can also use chopped nuts, like walnuts or pecans, for crunch. Want a little more chocolate? Throw in more chocolate chips or even mini marshmallows. Each extra ingredient can change the whole vibe of your bars.
Making It Vegan or Gluten-Free
To make these bars vegan, just use maple syrup instead of honey. Ensure that your chocolate chips are dairy-free. For a gluten-free option, check that your rolled oats are certified gluten-free. Almond flour is naturally gluten-free, so you’re already set on that front. This way, everyone can enjoy your tasty treats!
Storage Info
Best Storage Practices for Freshness
To keep your no-bake peanut butter bars fresh, store them in an airtight container. This will help prevent them from drying out. I recommend placing parchment paper between layers to avoid sticking. Keeping them in the fridge is best. The cool air helps maintain their texture and taste.
How Long Do No-Bake Peanut Butter Bars Last?
When stored properly in the fridge, these bars can last up to one week. After that, they may start to lose their texture and flavor. If you notice any changes in smell or appearance, it’s best to toss them. Always trust your senses to ensure safety.
Freezing Options for Longer Storage
If you want to keep your bars for longer, freezing is a great option. Wrap each bar in plastic wrap, then place them in a freezer-safe bag. They can last up to three months in the freezer. When you’re ready to enjoy them, let them thaw in the fridge for a few hours before eating. This keeps their flavor intact.
FAQs
Can I use natural peanut butter?
Yes, you can use natural peanut butter. Just make sure it is creamy. Natural peanut butter can be a bit runnier, so it may change the texture. You might need to adjust the amount of oats if it feels too soft.
How do I make the bars more chocolatey?
To make the bars more chocolatey, add more cocoa powder. You could also use more chocolate chips. Drizzling melted chocolate on top adds a rich touch. Just melt some chocolate and pour it over the bars before chilling.
What can I substitute for honey or maple syrup?
If you want a substitute for honey or maple syrup, try agave nectar. You can also use brown rice syrup or date syrup. These options will keep the bars sweet and sticky.
Can these bars be made in advance?
Yes, you can make these bars in advance. They store well in the fridge for up to a week. You can also freeze them for longer storage. Just wrap them tightly in plastic wrap or foil.
No-bake peanut butter bars are simple and fun to make. We covered key ingredients and how to tweak them. I shared step-by-step instructions for a smooth process. You learned tips to get the perfect texture and avoid common mistakes. We explored tasty variations to keep it exciting. Lastly, I provided storage tips for freshness.
Now, it’s time to get inventive in the kitchen. Enjoy your tasty creations, and share them with friends!


