
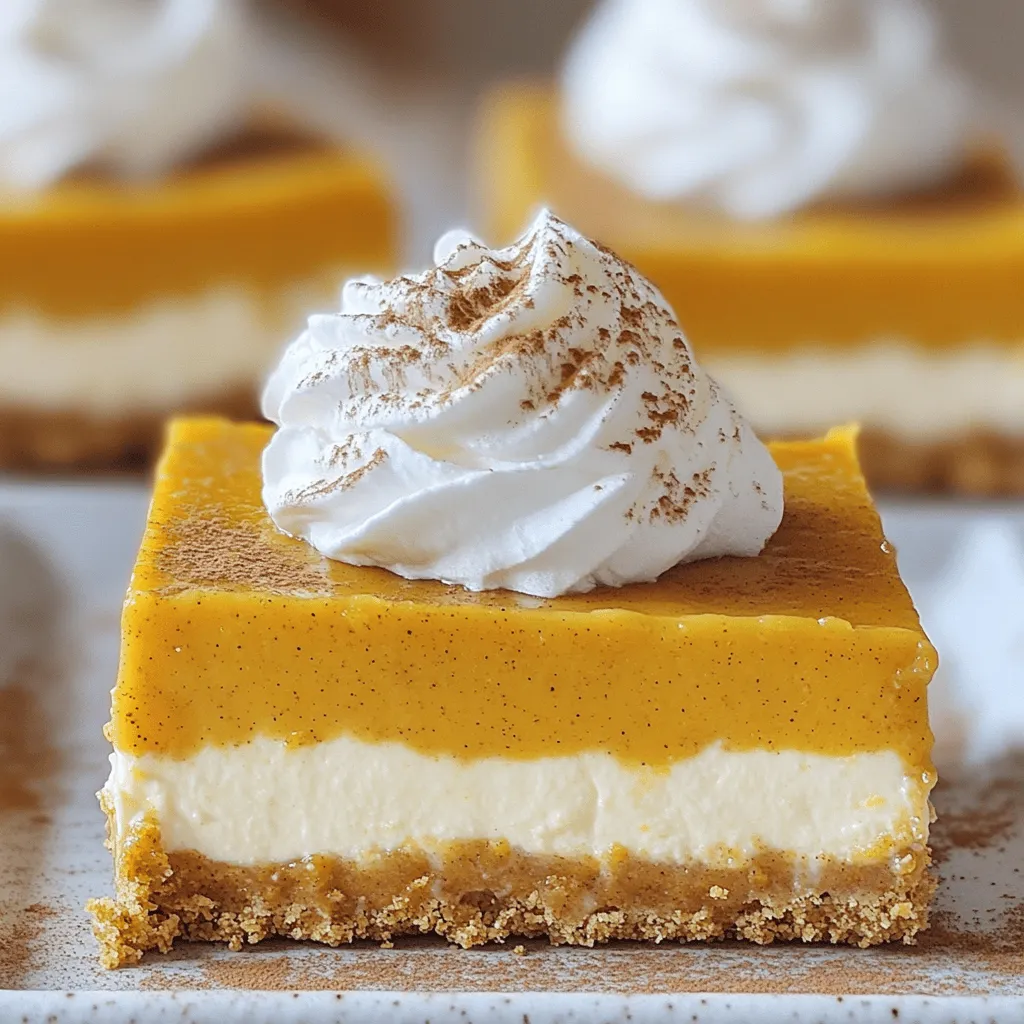
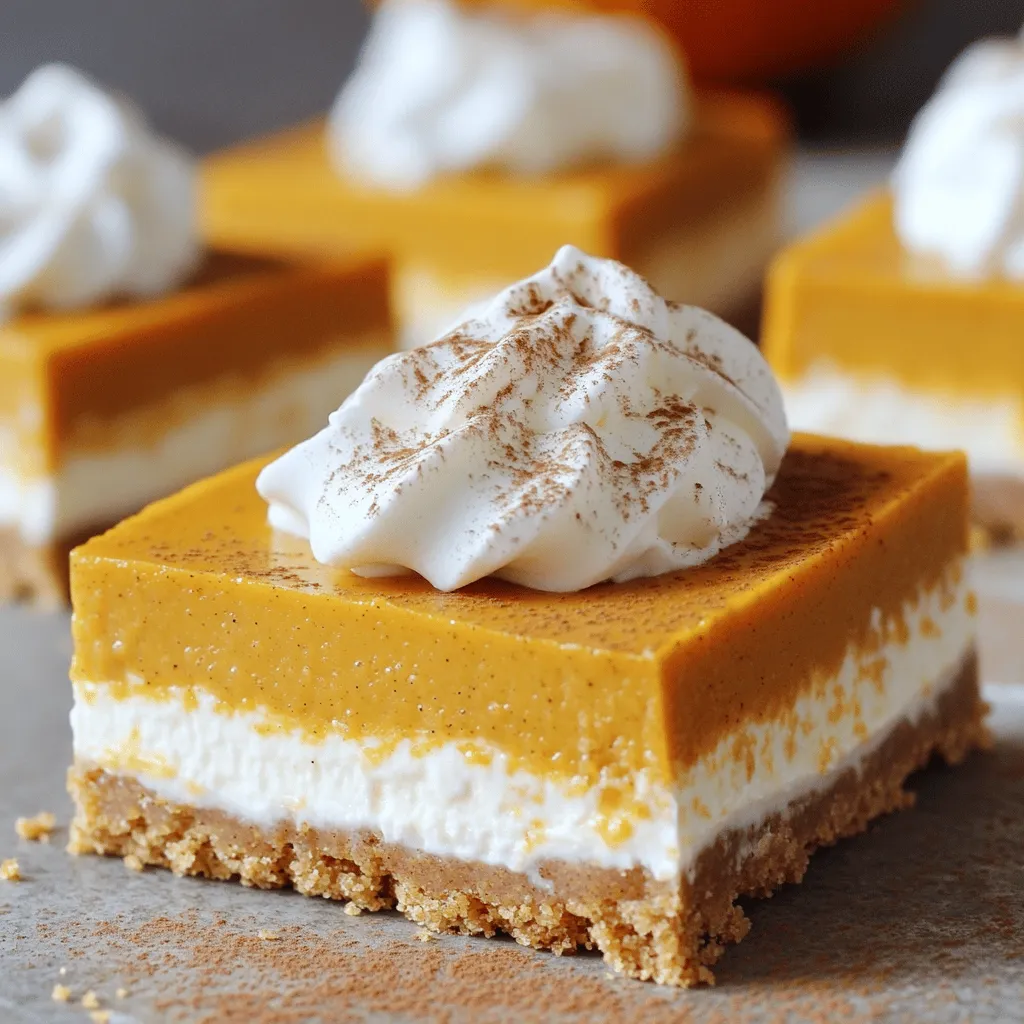
Craving something sweet and simple this fall? Let me introduce you to my No-Bake Pumpkin Pie Cheesecake Bars. These bars combine the rich taste of pumpkin with creamy cheesecake in an easy-to-make treat. No baking is needed, so you can enjoy this dessert without turning on the oven. Ready to dive in? Let’s explore the ingredients, instructions, and tips for a delightful fall dessert everyone will love!
Ingredients
List of Ingredients
– 1 1/2 cups graham cracker crumbs
– 1/4 cup granulated sugar
– 1/2 cup unsalted butter, melted
– 16 oz cream cheese, softened at room temperature
– 3/4 cup powdered sugar
– 1 teaspoon vanilla extract
– 1 cup canned pumpkin puree
– 1 teaspoon ground cinnamon
– 1/2 teaspoon ground nutmeg
– 1/4 teaspoon ground ginger
– 1/4 teaspoon salt
– 1 cup whipped cream (for topping)
– Additional ground cinnamon for garnish
Ingredient Tips
When choosing pumpkin puree, look for pure pumpkin. Avoid pumpkin pie filling, as it has added sugar and spices. Use granulated sugar for the crust and powdered sugar for the filling. Powdered sugar blends well, giving a smooth texture. For the best taste, always use fresh spices. Freshly ground nutmeg and cinnamon bring out the flavor.
Possible Substitutions
If you want a different sweetener, use maple syrup or agave nectar. For a dairy-free option, try vegan cream cheese. You can also use coconut cream instead of whipped cream. For gluten-free bars, swap graham crackers for gluten-free options like almond flour or gluten-free cookies.
Step-by-Step Instructions
Preparing the Crust
To get started, gather your ingredients. You will need graham cracker crumbs, sugar, and melted butter. In a medium bowl, mix the graham cracker crumbs with sugar. Make sure they blend well. Then, pour in the melted butter. Stir until it looks like wet sand. This mixture will become your crust.
Next, press this mixture into a 9×9 inch baking pan. Use your hands or a flat tool to pack it down firmly. A tight crust holds the bars together. Make it even across the bottom. This crust will form a strong base for your cheesecake filling.
Making the Cheesecake Filling
Now, let’s make the filling. Take a large bowl and beat the softened cream cheese with an electric mixer. Mix it until it becomes smooth and creamy. There should be no lumps. Gradually add powdered sugar and vanilla extract. Keep mixing until it is fully combined.
Next, it’s time to add the pumpkin. Carefully fold in the pumpkin puree and spices: ground cinnamon, nutmeg, ginger, and salt. Mix until everything is blended well. The filling should be smooth and free of lumps.
Assembling and Chilling the Bars
Pour the pumpkin cheesecake filling onto your prepared crust. Use a spatula to spread it evenly across the top. Make sure to smooth the surface for a nice finish.
Cover the pan with plastic wrap or foil. Place it in the refrigerator. Chill for at least 4 hours. This step helps the cheesecake set properly. Once it’s firm, you can lift it out of the pan using the edges of the foil. Cut it into squares or rectangles.
Top each bar with whipped cream. A sprinkle of ground cinnamon adds a lovely touch. Serve these delightful treats to friends and family. Enjoy the smiles they bring!
Tips & Tricks
Common Mistakes to Avoid
The first mistake is not pressing the crust tightly. If it’s loose, the bars may fall apart. Another common issue is overmixing the filling. Mix just enough to blend. Too much mixing adds air and can cause cracks. Lastly, don’t skip chilling. The bars need time to set properly.
Expert Tips for the Perfect Texture
To get a smooth filling, use room-temperature cream cheese. Cold cream cheese creates lumps. Mix the filling on low speed. This helps keep it creamy. For a lighter texture, fold in whipped cream gently. This adds air without making it too fluffy.
How to Achieve the Best Flavor
Always use pure pumpkin puree, not pie filling. The spices make a big difference, too. Freshly ground cinnamon and nutmeg provide richer flavors. Adjust spices to your taste. If you like more warmth, add extra ginger or cinnamon. Taste the filling before it sets to ensure it’s perfect!
Variations
Flavor Additions
You can add fun flavors to these bars. Try folding in some chocolate chips or chopped nuts. This adds crunch and richness. For chocolate lovers, a layer of melted chocolate on top works great. You can also add a swirl of caramel for a sweet touch. Each option gives your bars a unique twist.
Dietary Modifications
If you need a gluten-free version, use gluten-free graham crackers. You can also swap regular cream cheese for a dairy-free option. This way, more people can enjoy your dessert. For vegan bars, use coconut cream instead of cream cheese. Make sure to pick a vegan whipped cream to top your bars.
Seasonal Twists
Make your bars festive by adding seasonal flavors. For Thanksgiving, consider mixing in cranberries or pecans. You can also add a hint of orange zest for a bright flavor. In winter, a touch of peppermint extract can give your bars a holiday flair. These seasonal twists keep your dessert exciting all year round.
Storage Info
Best Practices for Storing Leftovers
To keep your no-bake pumpkin pie cheesecake bars fresh, store them in the fridge. Use an airtight container to prevent any odors from mixing. If you use foil or plastic wrap, make sure it is tightly sealed. This will help the bars stay moist and tasty. Enjoy them within four days for the best flavor.
How to Freeze for Long-Term Storage
Freezing these bars is simple. First, cut them into squares or rectangles after they are fully chilled. Then, wrap each piece tightly in plastic wrap. Place the wrapped bars in a freezer-safe container or a zip-top bag. Be sure to label the bag with the date. They can stay in the freezer for up to three months. When you want to enjoy them, let the bars thaw in the fridge overnight.
Shelf Life and Freshness
These delicious bars stay good in the fridge for about four days. If you freeze them, they will last for three months. For the best taste, eat them sooner rather than later. Freshness is key to enjoying the creamy pumpkin flavor. If you notice any off smells or changes in texture, it’s best to toss them out.
FAQs
Can I make these bars ahead of time?
Yes, you can make these bars a day ahead. This makes them perfect for parties. Just chill them in the fridge. They taste even better after sitting overnight. The flavors blend well and get richer.
What can I use instead of cream cheese?
You can use Greek yogurt or silken tofu as a swap. Both work well and keep the cheesecake creamy. Greek yogurt adds a nice tang, while silken tofu gives a smooth texture. Adjust the sugars if needed for taste.
How do I know when the cheesecake is set?
The cheesecake is set when it feels firm to the touch. You can also gently shake the pan. If it jiggles slightly in the center, it needs more time. Chill it longer if it isn’t firm enough.
This blog post covered all you need for perfect cheesecake bars. We explored simple ingredients, with tips on choosing the best options. You learned step-by-step instructions to prepare the crust and filling, plus how to chill them.
We also discussed common mistakes and expert tips to avoid them. You can make variations to fit your taste or diet. Finally, we shared best practices for storing leftovers. Now, you’re ready to create delicious bars that everyone will enjoy!


