
Craving a sweet treat that’s easy to make? You’ll love my No-Churn Chocolate Peanut Butter Cup Ice Cream! This creamy dessert doesn’t need an ice cream maker, so you can whip it up in no time. With rich chocolate, smooth peanut butter, and crunchy cups, this ice cream is pure bliss. Stick around to learn how to create this delicious dessert at home, all while impressing yourself and your friends!
Ingredients
List of Ingredients
– 2 cups heavy cream
– 1 cup sweetened condensed milk
– ½ cup smooth peanut butter
– 1 teaspoon vanilla extract
– ½ cup semi-sweet chocolate chips
– ½ cup mini peanut butter cups, chopped
– A pinch of salt
Measuring Tips
Accurate measurements matter for the best ice cream. Use a dry measuring cup for solid ingredients, like peanut butter. For liquids, a liquid measuring cup works best. When using heavy cream, ensure it is cold for better whipping. Always level off dry ingredients with a straight edge for precision.
Ingredient Substitutions
You can swap some ingredients if needed. For a lower fat option, use light cream instead of heavy cream. If you want a nut-free version, try sun butter in place of peanut butter. You can also use dairy-free chocolate chips for a vegan treat.
Step-by-Step Instructions
Preparing the Whipped Cream
Start by pouring 2 cups of heavy cream into a large bowl. Use an electric mixer on medium-high speed. Whip the cream for about 3 to 5 minutes. You want stiff peaks to form. The cream should look thick and fluffy. This step is key for your ice cream’s texture.
Making the Peanut Butter Base
In a separate bowl, mix 1 cup of sweetened condensed milk, ½ cup of smooth peanut butter, 1 teaspoon of vanilla extract, and a pinch of salt. Stir with a whisk or spatula until smooth. This mixture is rich and creamy. It will be the flavor base for your ice cream.
Folding Techniques for a Fluffy Texture
Next, you will fold the whipped cream into the peanut butter base. Do this in three parts. Use a spatula to gently lift the cream from the bottom. Fold it over the peanut butter mixture carefully. You want to keep the air in the whipped cream. This makes your ice cream light and fluffy.
Adding Chocolate Chips and Peanut Butter Cups
Once your whipped cream is mixed in, it’s time for the fun part. Add ½ cup of semi-sweet chocolate chips and ½ cup of chopped mini peanut butter cups. Gently stir to combine. This adds a delightful crunch and bursts of chocolate flavor. Ensure the candies are spread evenly throughout the mix.
Freezing Instructions
Pour the mixture into a 9×5 inch loaf pan or any container you have. Smooth the top with a spatula for a clean look. Cover it tightly with plastic wrap or a lid. This helps prevent ice crystals from forming. Place it in the freezer for at least 6 hours. Wait until it is solid before serving. When ready to enjoy, let it sit for 5 to 10 minutes to soften. This makes scooping easier and enhances the taste.
Tips & Tricks
Tips for Perfectly Whipped Cream
To make great whipped cream, start with chilled heavy cream. Cold cream whips better and faster. Use a clean bowl and beaters for the best results. Whip on medium-high speed. Stop when you see stiff peaks. This means the cream is thick and ready. Be careful not to over-whip. If you do, the cream can turn grainy.
How to Prevent Ice Crystals
Ice crystals can ruin your ice cream’s smooth texture. To avoid this, cover your ice cream tightly. Use plastic wrap or a lid. This helps keep air out. You can also stir the ice cream halfway through freezing. This breaks up any crystals that do form. Just use a fork to mix it well.
Serving Suggestions
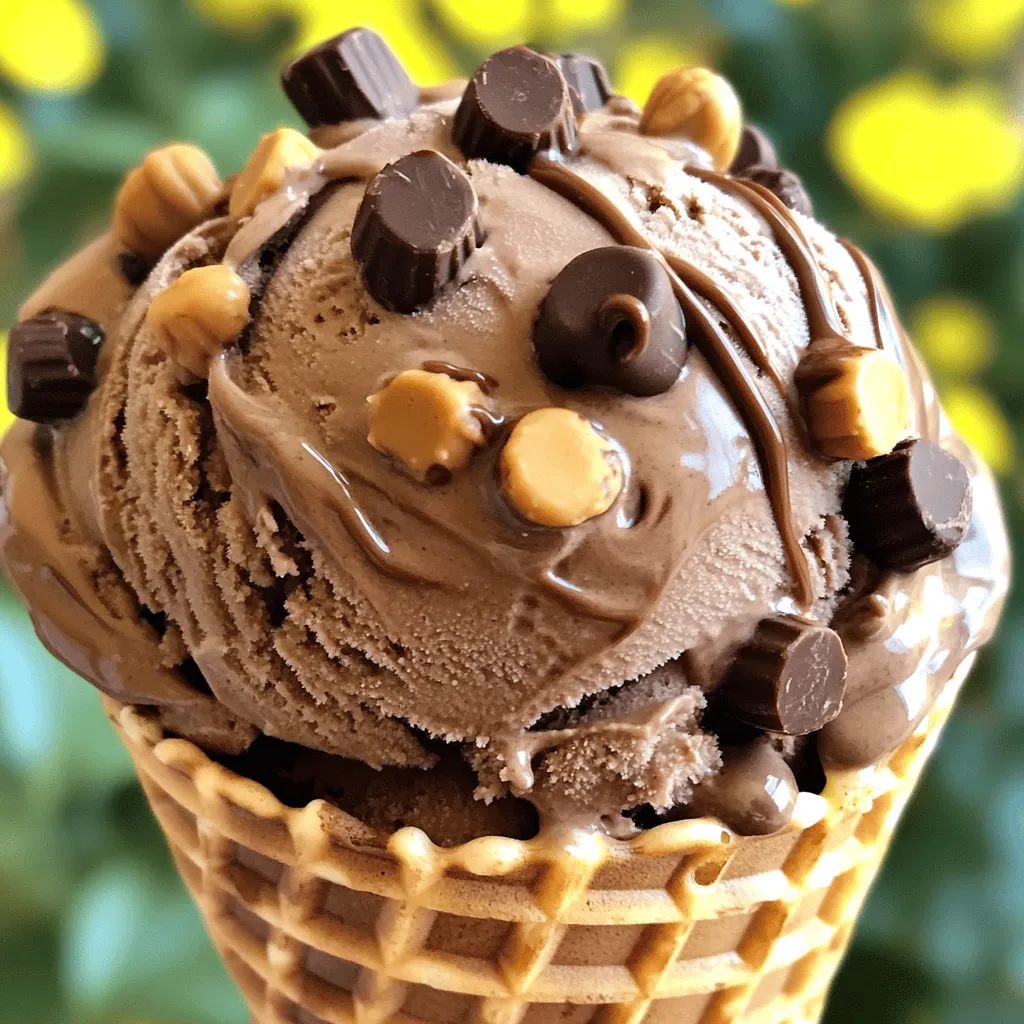
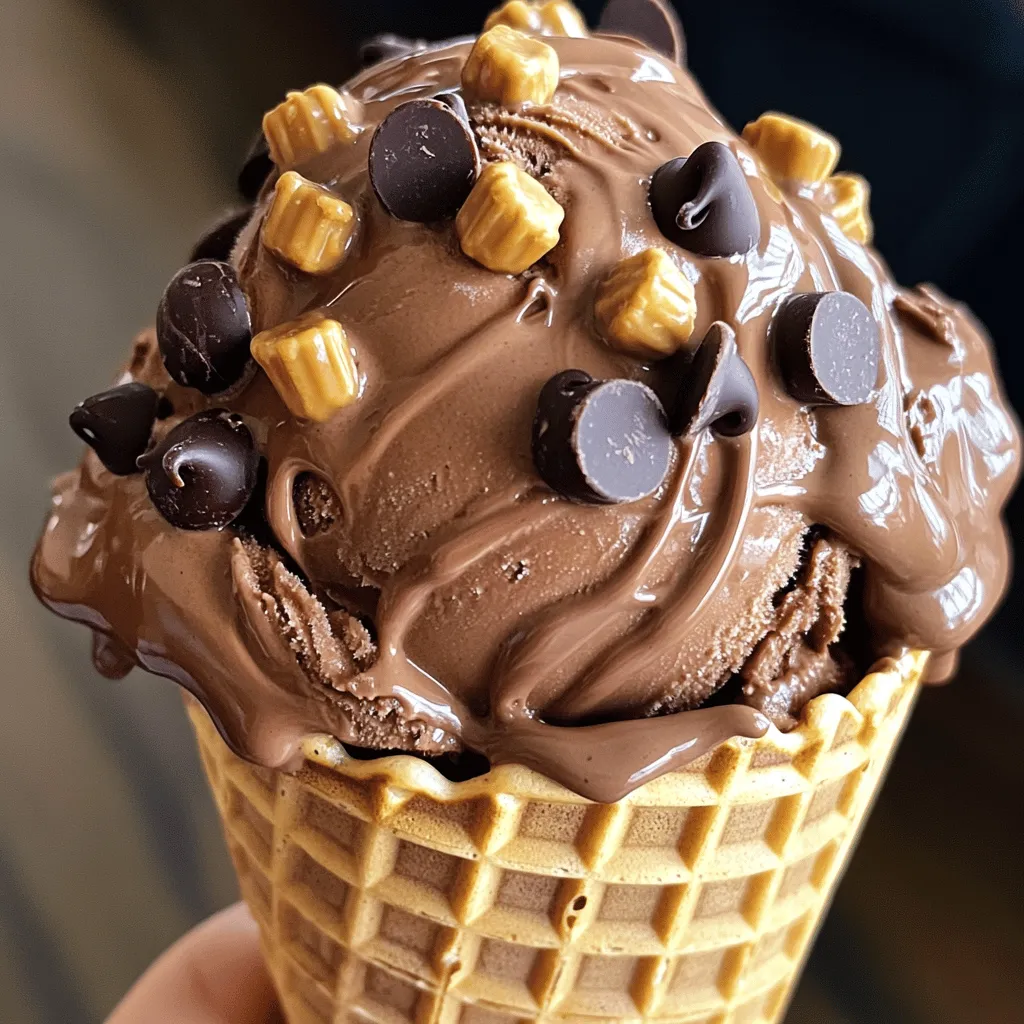
Serve your ice cream in waffle cones or bowls. For a fun twist, top each scoop with more chopped mini peanut butter cups. A drizzle of chocolate sauce adds extra flavor and looks great. You can also pair it with fresh fruit for a tasty contrast. Enjoy your treat with friends or family for a fun dessert moment!
Variations
Different Flavor Combinations
You can switch up the flavors in many fun ways. Try adding a swirl of caramel or a dash of coffee for a kick. Want a fruity twist? Mix in some crushed strawberries or bananas. A mint chocolate version is also easy; just add mint extract and chopped mint candies. Each of these flavors brings a unique taste to your ice cream.
Dairy-Free Option
If you want a dairy-free treat, use coconut cream instead of heavy cream. Look for a dairy-free condensed milk to replace the sweetened condensed milk. Smooth almond or cashew butter works great too. These swaps let you enjoy the same rich taste without dairy.
Additions and Mix-ins
Mix-ins can take your ice cream to the next level. You can add nuts for crunch, like chopped almonds or walnuts. Crushed cookies, such as Oreos, add fun texture and flavor. Want more chocolate? Toss in chocolate chunks or even brownie pieces. The key is to keep the mix-ins balanced so they don’t overwhelm the ice cream base. Enjoy getting creative!
Storage Info
Best Practices for Freezing
To keep your no-churn chocolate peanut butter cup ice cream fresh, follow these tips:
– Store the ice cream in an airtight container. This keeps out air and helps avoid ice crystals.
– Use plastic wrap to cover the surface of the ice cream before sealing the lid. This adds extra protection.
– Make sure your freezer is set to 0°F (-18°C) or lower for best results.
Shelf Life of No-Churn Ice Cream
This ice cream stays tasty for about 2 to 3 weeks in the freezer. It’s best to finish it sooner for the best flavor. After that period, it might lose some of its creamy texture.
How to Revive Ice Cream After Freezing
If your ice cream gets too hard, don’t worry! Just let it sit at room temperature for 5 to 10 minutes. This softens it up, making scooping easy. If it still feels too hard, try using a warm scoop dipped in hot water. This helps it glide through the ice cream smoothly. Enjoy every rich, creamy bite!
FAQs
Can I use an ice cream maker for this recipe?
No, you do not need an ice cream maker. This no-churn recipe works well without one. You simply whip the cream and fold it into the peanut butter mix. This keeps it light and creamy. You can enjoy delicious ice cream without any special tools.
How long does it take to freeze the ice cream?
Freezing time is key. It takes at least 6 hours for the ice cream to set fully. If you want it to be perfect, freeze it overnight. This helps all the flavors meld together. Patience is important here!
What can I do if the ice cream is too hard?
If your ice cream is too hard, let it sit out for 5 to 10 minutes. This helps soften it up. You can also place it in the fridge for a short time. Both methods make scooping easier and improve your serving experience.
Can I use crunchy peanut butter instead?
Yes, you can use crunchy peanut butter. It adds a fun texture to the ice cream. Just remember, it may change the smoothness of the base. If you love the crunch, go ahead and switch it up!
You learned how to make no-churn ice cream using simple ingredients and steps. We covered measuring tips, ingredient swaps, and ways to whip cream perfectly. Remember, folding techniques help create a fluffy texture. Explore variations like dairy-free options and different flavors. Store your ice cream properly for the best taste and freshness. With these tips, you can create a delicious treat that fits your needs. Now, go ahead and enjoy your homemade ice cream!


